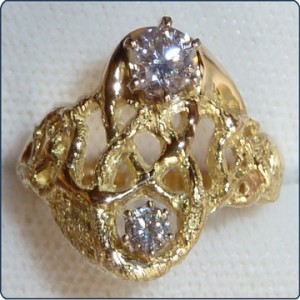
I was recently commissioned to design and create a gold ring with three
specific criteria in mind:
1.) A Celtic knot was to be integral to
the design
2.) I had to use no more gold than
what was provided by the client
3.) 1 each 1/2 and 1/3 carat
diamonds from existing rings were to
be incorporated.
Client’s Comment
“The ring Rosanna created for me was to unite both my late husband’s wedding band with mine and use the stones from my engagement ring. The only guidance I gave was to ask for a Celtic knot. The beautiful ring Rosanna created shows a remarkable artistic interpretation of what the rings meant to me. This heirloom has brought me many hours of joy and whenever I wear it I receive many compliments on it’s unique design. This one handed artist is so talented and deserves enormous praise, recognition and success.”
Dr. Fran Fisher
The Process
This was my first post stroke go at making a wax model for a piece of jewelry. I dug out my tools and supplies and made a quick assessment of what I would need to get the job done. First, and foremost, I needed a hands-free ring mandrel on which to “build” the model. Second, I needed a non-skid surface for my alcohol lamp, some adhesive tape to hold things in place and a fresh supply of modeling wax.
The alien attachment to my head is a magnifier. My work surface is a rubberized cutting mat.
My gas lamp sits on a swatch of cut nonskid shelf liner that can be purchased by the roll at drug stores, markets and hardware stores. The blue and purple knobs are modeling wax that I have melted onto the lamp for easy access.
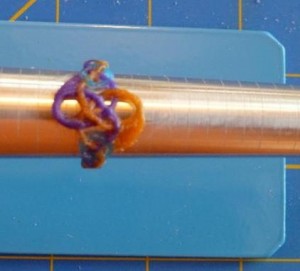
This is the wax model that was sent out for casting and finishing. The diamond mountings were soldered onto the finished casting. The diamonds were set by the jeweler who executed the casting.


